Business Listing on Google – You can get your business listed on Google through the ‘Google My Business’ service provided by Google. In this post, you can find a step-by-step process on how to use Google My Business to get your business listed on Google for FREE.
You can also follow the process in search engines like bing for free.
Check out the post Uncover the laws of marketing in today’s digital world which will make sense why it is important to get your Business Listed on Google.

You can post photos and offers to your profile to show what makes your business unique, and give customers reasons to choose you every time.
Your customers are ready to connect – by calling, messaging or leaving reviews. Now, with more ways to transact, you can do more business.
What is Google My Business?
Google My Business (GMB) is a free tool created by Google to help business owners manage how they appear on Google search results and Google Maps.
With GMB, you can claim your free local business listing on Google and add things like your contact
information, business hours, photos, services, and much more.
How to get Business Listing on Google?
NOTE: It is recommended that you set this up from a desktop or a laptop. It will be much easier.
Step -1:
Firstly, Visit the following page: www.google.com/business
Step -2:
Next, Be sure you are signed into the Gmail account you want to be associated with your Google business listing.
Step -3:
Then, Click Manage now.
If your business doesn’t appear, click the result that has the text under your business name that says:
“Create a business with this name”.

Step -4:
Then the next step is to get the category right. When you set your “categories” you’ll be able to set both primary and secondary categories.
Indeed, Getting this step right is crucial if you want to show up on Google’s results page when potential customers are searching for a product or service you offer.

Step -5:
Additionally, add your Business Location.
On the other hand, If you have a store or office where your customers can visit, click on Yes.


Step -6:
However, If you selected ‘No’ in step 5, the next step will ask you to list your service areas (this step is optional)

Step – 7:
Then click Next. Now you need to specify the region your business is based in.

Step -8:
Simultaneously, enter Your Contact Details and click Next.

Step – 9:
Finally, Click Finish and Verify your Business.

Step -10:
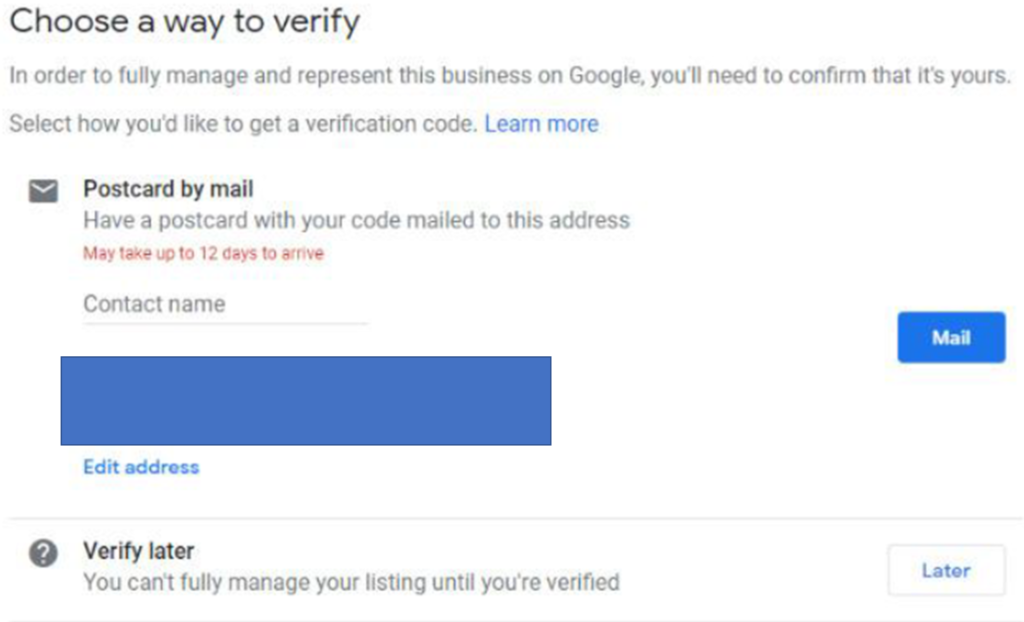
Moreover, you’ll have to verify your business and that may take a couple of days. In addition to that, you can optimize your listing in the meantime though.
Consequently, depending on what kind of business listing you’re attempting to create (or manage) you’ll have a few options available to verify your business:
• Verify by mail (postcard)
• Verify by phone
• Verify by email
• Instant verification
• Bulk verification
Although Google may give you a different option to verify your business for most business owners, you’ll have to wait for a postcard to be mailed to you from Google with a verification code on it.

Actually, Once your postcard arrives you’ll need to visit google.com/verifymybusiness, sign in to your Google account, Enter your verification code and Submit!
And that’s it. You now have your listing done. As was previously stated, Do in a similar way in bing search engine as well.
